Posted on Leave a comment

DIY Hedgehog Feeding Station: A Step-by-Step Guide

Wild hedgehogs are adorable little visitors in gardens, but winter and early spring are tough for them. During hibernation, they rely on stored fat to survive. Unfortunately, if they wake up early or run out of fat reserves, they can struggle to find enough food and starve. One of the best ways to support these prickly friends is by providing a safe feeding station.

The good news? You don’t need to be a carpenter or spend a fortune. This DIY project is easy, fun, and hedgehog-friendly!

Why Hedgehogs Need a Feeding Station?

Hedgehogs are nocturnal creatures that eat insects, worms and sometimes fruit. During late winter and early spring, natural food sources can be scarce, especially in urban areas. A feeding station provides safe access to food and water, keeps hedgehogs away from predators like cats or foxes, and helps them gain energy as they wake up from hibernation.


Materials Youll Need

Most items can be found at home or in a hardware store:

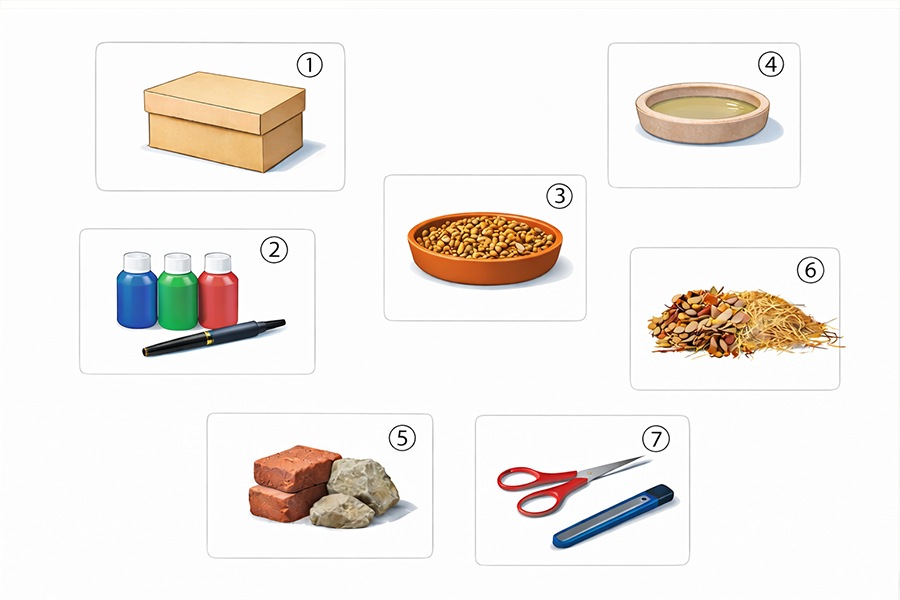
  • A small plastic or wooden box (around shoebox size)
  • Non-toxic paint or marker (optional, for decoration)
  • Small bowl for food
  • Small water dish
  • A few rocks or bricks (to elevate the box slightly)
  • Leaves, straw or dry grass for insulation
  • Tools like scissors or a craft knife


How to Make a Hedgehog Feeding Station?

1.Pick a Safe Spot

Hedgehogs need quiet, sheltered areas to feel safe. You can place the feeding station under bushes, hedges or shrubs to provide natural cover. Avoid areas with heavy foot traffic or pets. If you know where hedgehogs hibernate, put the station nearby but not directly on top of the nest. Make sure the spot drains well because hedgehogs don’t like wet feet. Additionally, avoid using pesticides around the box.


2.Prepare the Box

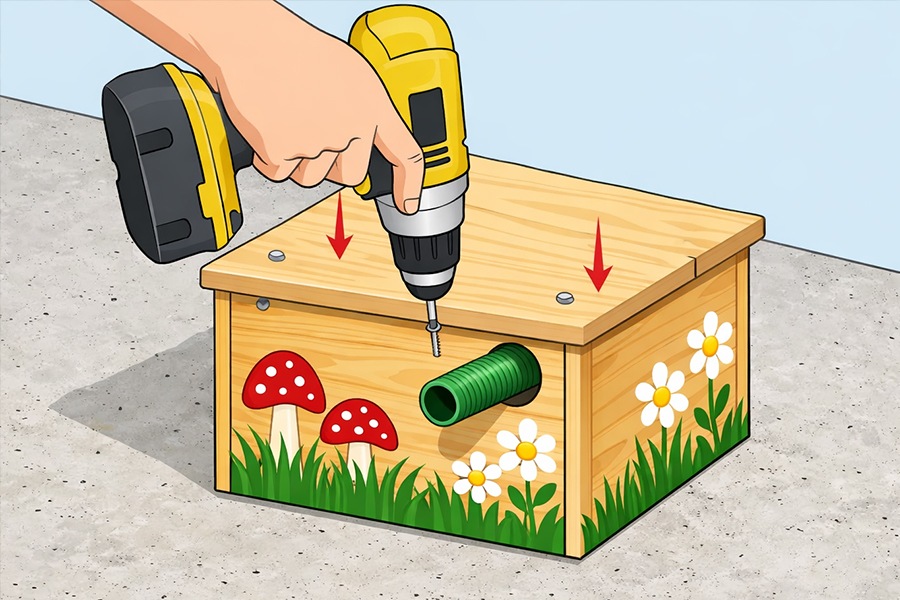
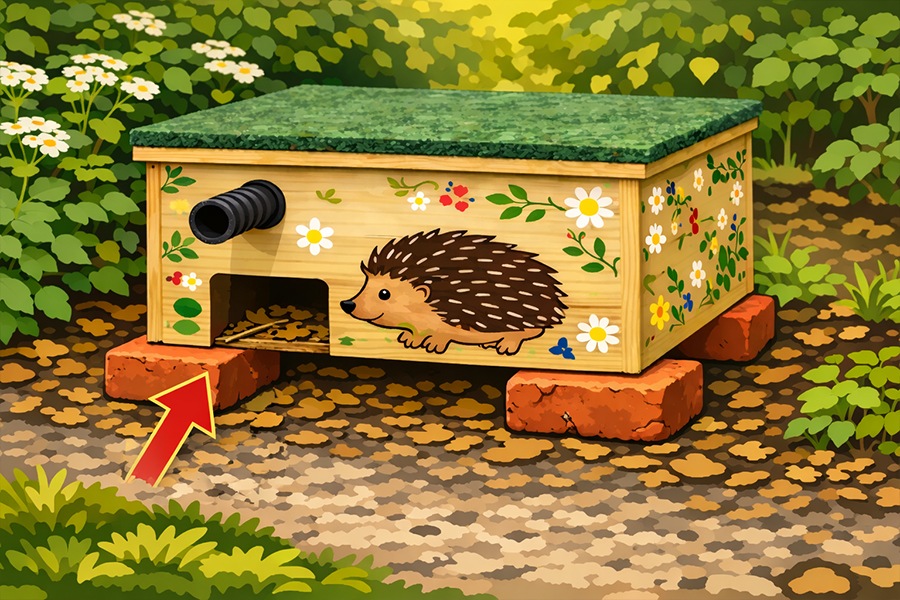
If you’re using a wooden box, sand down any sharp edges or nails carefully. Drill a hole (around 2 inches) near the top of the box, and insert a small piece of hosepipe, angled slightly down, to let air in and keep the rain out. You can also decorate the box with non-toxic paints and markers to make it more appealing but avoid bright colors that will scare off wildlife. Make sure the box is sturdy and has a flat bottom it doesn’t tip over.


3.Add Food and Water

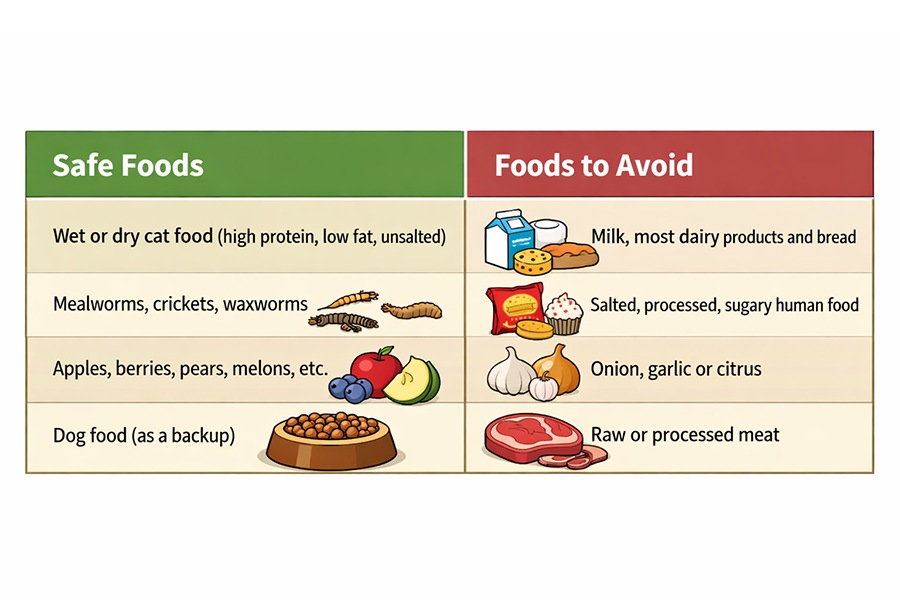
Place a small bowl of wet or dry cat food inside the box. Hedgehogs drink frequently, so don’t forget to add a shallow dish of water to keep them hydrated. Don’t add milk! Milk will make them dehydrated and cause digestive issues. If possible, sprinkle some mealworms (nice protein), crickets or chopped fruit to make it more nutritious. Refill food and water every day, especially when it’s cold or wet.
4.Insulate and Protect

Hedgehogs like cozy, familiar spaces. You can add some dry leaves, straw or grass around the bowls, which keeps the food dry and creates a soft, comfortable resting space. Make sure the bedding doesn’t completely block the hedgehog’s path in and out. If the bedding gets wet or dirty, replace it immediately.


5.Elevate Slightly

Keeping the feeding station slightly off the ground helps with drainage. Place 2-4 flat rocks, bricks or wooden blocks under the box for stability. A slight elevation of 1-2 inches is enough to keep water away but low enough for hedgehogs to easily enter. Make sure the box doesn’t wobble or tip over when nudged.


6.Cat-Proofing

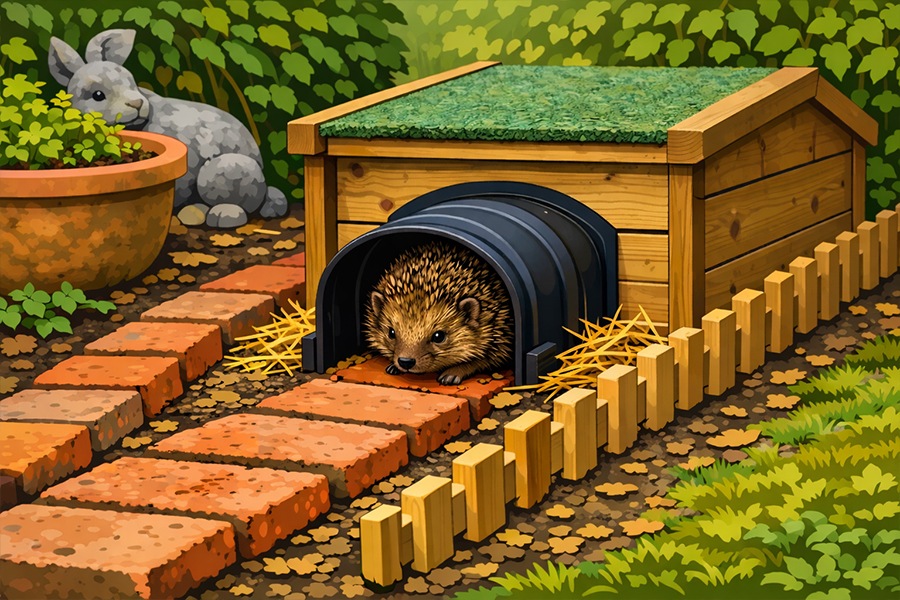
Hedgehogs are gentle and snow, so curious pets can interfere. Cut a small entrance hole (5 inches wide), just enough for hedgehogs to enter. Keep the entrance low to the ground for easy access. Add a short tunnel or flap in front of the entrance if cats are frequent visitors. You can guide hedgehogs safely into the box with a narrow path of bricks or fencing if you have lots of pets or larger animals in the garden.
Posted on Leave a comment

Why Do Hedgehogs Wake Up Early from Hibernation?

Hedgehogs are one of our most loved garden visitors, known for their shy nature and winter hibernation. Normally, they sleep through the coldest months to conserve energy when food is scarce. But in recent years, more people are spotting hedgehogs waking up early from hibernation, sometimes as early as January or February.

So why does it happen, and should we be worried?

Why Do Hedgehogs Hibernate?

Hedgehogs hibernate to survive winter when insects, worms and beetles are hard to find. During hibernation:

  • Their heart rate and breathing slow dramatically
  • Body temperature drops
  • They rely entirely on stored fat reserves

Hibernation usually lasts from late autumn until March or April, but warmer winters and mild nights can cause them to wake up early.


Why Do They Wake Up Early?

Early waking isn’t always a problem, but it can be risky. Here are the most common reasons it happens:

1.Warmer Winters

Milder temperatures can confuse a hedgehog’s natural rhythm. If nights stay warm for several days, hedgehogs may wake up thinking spring has arrived, only to find little food available.

2.Nest Disturbance

Hibernation nests can be disturbed by garden work, pets, flooding or strong winds. If their nest becomes cold, wet or unsafe, hedgehogs may wake and move elsewhere.

3.Insufficient Fat Reserves

Young and underweight hedgehogs may wake early because they run out of energy. This is one of the most dangerous scenarios, as they might not have enough strength to find food.

4.Natural Wake-Ups

It’s normal for hedgehogs to briefly wake up during hibernation to change nesting spots, drink water and adjust body position. Most of the time, they settle back into sleep without issue.


Is It Dangerous for Hedgehogs to Wake Early?

Sometimes yes, sometimes no. A healthy hedgehog that wakes briefly on a mild night and returns to hibernation is usually fine. However, early waking becomes dangerous when:

  • Temperatures drop again suddenly
  • Food is unavailable
  • The hedgehog is thin, weak, injured or active during daylight

Each wake-up burns precious energy, and repeated waking can be fatal, leading to exhaustion, hypothermia and starvation. If they cannot refuel that energy, they may quickly become weak. This is why early sightings should never be ignored. While not every awake hedgehog is in danger, careful observation and timely support can make a crucial difference in helping them survive the winter.

What to Do If You See an Awake Hedgehog?

1.Check the Time & Temperature

If it’s daytime or below 5°C (41°F), the hedgehog may be in trouble. Hedgehogs are nocturnal, so if they’re active during daylight, it’s typically a sign of distress, illness and hunger.

2.Offer Food and Water

If you’re unsure, it’s safe to put out meat-based wet cat or dog food (avoid fish flavors) and a shallow bowl of fresh water. Never give mile as it causes dehydration and digestive issues.


3.Provide Shelter

Create a quiet, safe space by leaving a pile of dry leaves in a sheltered corner of your garden. You can also place a hedgehog house or a simple box with a small entrance to help retain warmth.


4.Don’t Move Them Unless Necessary

If the hedgehogs look active and healthy at night, it’s best to leave them alone. Moving a healthy hedgehog can cause unnecessary stress.

When to Call a Rescue?

Contact a wildlife rescue immediately if:

  • The hedgehog is out during daylight
  • It looks thin, weak or injured
  • Temperatures drop below freezing (5°C)
  • It weighs less than 600g in winter


Tips: Always call first — most rescues rely on volunteers and aren’t staffed 24/7. If a rescue isn’t available locally, a 24‑hour emergency vet can also help until a rescue is reachable.

How Can You Help Hedgehogs All Winter?

Here are some simple ways to help:

  • Leave untidy areas in your garden
  • Avoid disturbing leaf piles
  • Check bonfires before lighting
  • Put out food during mild winter spells
  • Keep gardens connected with small access gaps
Posted on Leave a comment

Big Garden Birdwatch 2026

Big Garden Birdwatch is organized by the RSPB and has been running for 40 years. The goal is simple: to count the birds we see and help scientists understand how bird populations are changing. In 2026, the event take place from January 23 to 26, and anyone can take part. You don’t need to be an expert at identifying birds. The RSPB provides simple bird guides with pictures, making it easier for beginners, families and children. All you need is one hour, a little patience and a love for birds.


Why Big Garden Birdwatch Matters?

Birds are great indicators of how healthy nature is. When bird numbers fall, it often means there are problems like habitat loss, lack of food or climate change. Over recent years, many common garden birds have declined, including house sparrows, starlings and greenfinches. By taking part in Big Garden Birdwatch, you’re helping conservationists spot these changes early. The results help guide conservation projects, protect habitats, etc.

How to Take Part in Big Garden Birdwatch?

Step 1: Register

Sign up for Big Garden Birdwatch on the RSPB website. You’ll get

  • A simple bird ID guide
  • A results form
  • Helpful tips for counting birds

Step 2: Prepare Your Birdwatch Spot

A few days before your chosen hour:

Put out bird food (seeds, fat balls and suet)

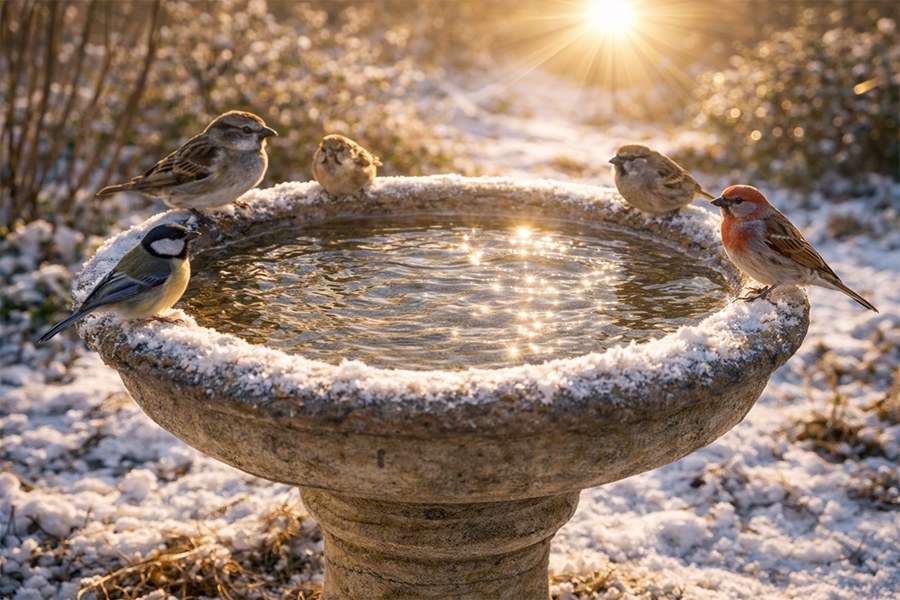
Make sure there is fresh water for drinking and bathing

Choose a quiet place where you can watch comfortably

You can watch from indoors through a window, use a pair of binoculars, or even install bird box cameras or bird feeder cameras to record the garden birds.


Step 3: Choose One Hour

Pick any one hour during the Birdwatch weekend (Jan 23-25, 2026). You can choose a time when birds are usually active, such as early morning and late afternoon. You can watch birds from:
  • Your garden
  • A balcony
  • A local park
  • A school playground
  • Or through a window

Step 4: Watch and Count

During your hour:

  • Watch all the birds that land in your garden or area
  • Looking for birds on feeders, trees, fences and the ground
  • Use the RSPB bird guide to match birds by size, colour, and shape
  • Count the largest number of each bird species you see at one time
  • Don’t add birds together across the hour (this avoids double counting)

Most importantly, do not move around too much. Stay calm and quiet.

Step 5: Record Your Results

Write down:

  • Bird species
  • Highest number seen at once

You can use a paper sheet or note everything on your phone or tablet. If you’re unsure about a bird, it’s okay to skip it.


Step 6: Submit Your Results

After your hour, enter your results into the online form via the RSPB website. You can submit even if you saw only one bird or saw no birds at all. All results are valuable.

What Birds Might You See?

During Big Garden Birdwatch, you’re likely to spot some of the most familiar garden birds. Common visitors include house sparrows, blue tits, great tits, robins, blackbirds, wood pigeons and starlings. Depending on where you live, you might also see collared doves, magpies, goldfinches, chaffinches or long-tailed tits. Gardens near parks, fields or woodland may attract even more variety.


Make It Fun for the Whole Family

Big Garden Birdwatch is a great activity for families. Children love spotting birds and learning their names. You can turn it into a small event:

  • Keep a simple bird checklist
  • Draw pictures of the birds you see
  • Talk about why birds are important

It’s a wonderful way to connect children with nature, especially during winter when wildlife feels harder to notice.

Help Birds Before and After the Count

You can make your garden more bird-friendly, not just during Birdwatch weekend but all year round. Simple actions help a lot:

  • Put out bird food like seeds, suet or fat balls
  • Provide fresh water for drinking and bathing
  • Plant shrubs or trees that offer berries and shelter
  • Avoid using chemicals in your garden

If you want to take it a step further, installing a bird box gives birds a safe place to nest. Some people even use bird box cameras to watch birds without disturbing them, which is a great way to learn more about their behaviour.

Our Recommendations

WiFi Bird Box Camera

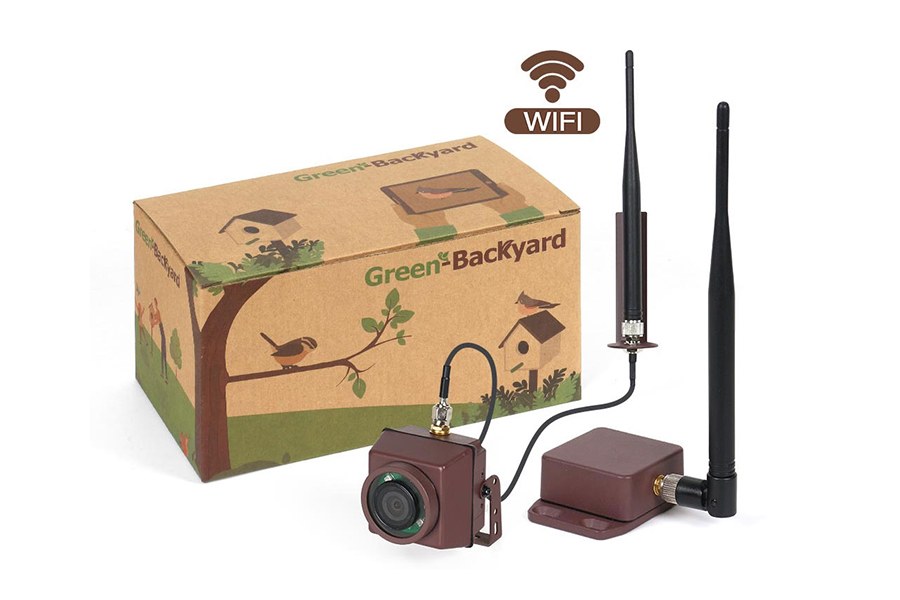
This camera connects directly to your WiFi so you can watch nesting birds live on your phone or tablet.

Shop Now

Long Range WiFi Bird Box Camera

Designed for gardens or outdoor areas where standard WiFi doesn’t reach, it supports a wireless range of up to 650ft.

Shop Now

4K PoE Bird Box Camera

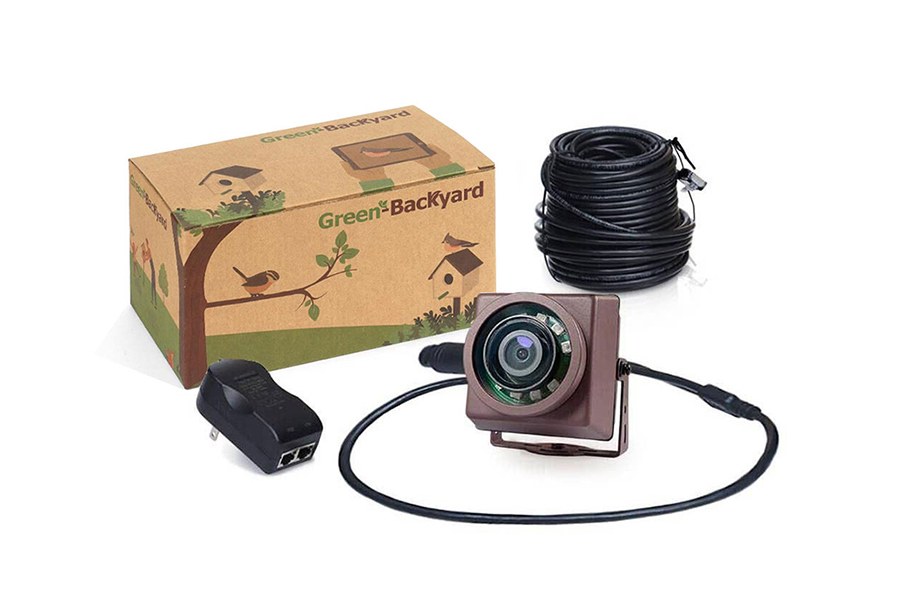
It delivers ultra-clear 4K video and uses PoE for a stable, always-on connection for livestreaming.

Shop Now

Smart Bird Feeder Camera

Watch birds up close as they feed, with smart features that make birdwatching fun and interactive.

Shop Now
Posted on Leave a comment

How Birds Find Food Under Snow?

When winter rolls in and everything gets buried under a soft white blanket, it’s easy to assume that birds must struggle to find anything to eat. I mean, if we lose a mitten in the snow, good luck ever seeing it again. Yet birds somehow manage to survive long, icy months with their bellies full enough to keep going. So how do they do it? How do these tiny creatures sniff out snacks hidden under layers of snow?

Let’s explore the clever, surprising, and sometimes downright impressive strategies birds use to find food during winter.

1.Super Senses

Even though most birds don’t have a sense of smell as advanced as that of dogs or bears, many species make up for it in other ways.

  • Sharp Vision

Birds rely heavily on eyesight, and some species have incredibly sharp vision. Chickadees, jays, and sparrows remember exactly where they hid seeds earlier in the year. A thin layer of snow won’t stop them from remembering which twig, stump, or crack they used as storage.

  • Excellent Hearing

Some birds, like owls, have hearing so sensitive they can detect tiny movements under snow. A mouse shifting beneath the surface sounds like a dinner bell to a hungry owl. Even a soft scuffle can guide them straight to a hidden meal.

  • Memory Power

Food-caching birds—like nuthatches, woodpeckers, and chickadees—store hundreds or even thousands of seeds in autumn. The wild thing? They remember the placement of these caches for weeks or months. Snow can fall, melt, fall again… and they’ll still find their stash like little feathered treasure hunters.


2.Snow-Digging

Some birds don’t rely on memory or hearing—they just go for it and dig.

  • Scratching and Scraping

Ground-feeding birds such as juncos and sparrows use their feet to scratch at the snow, revealing seeds, insects, or plant material hidden underneath. They hop, scratch, hop, scratch—a sort of winter dance routine that helps them uncover meals.

  • Using Their Beaks Like Ice Picks

Birds like grouse or pheasants push through snow using strong beaks and bodies. They clear little spots in the snow to get to buried vegetation. Ruffed grouse even burrow into snow for shelter, which also puts them closer to buds and twigs they love to nibble.


3.Following Clues

Winter is not the time to be prideful—birds copy each other constantly. If one bird discovers a good feeding patch, others quickly notice. Mixed flocks share information simply by staying close. One bird finds a jackpot, and the rest swoop in like guests who heard there was free pizza. Predatory birds, especially owls and hawks, can sense movement through the snow. They watch for:

  • small tunnels created by rodents
  • shifting snow
  • or even breathing patterns under the surface

The moment they detect motion, they dive.


4.Finding What’s Still Above the Snow

Not everything disappears under winter layers. Many food sources stick out, literally.

  • Seeds and Berries

Plants like sumac, mountain ash, and winterberry hold onto their fruit well into the colder months. Birds spot these bright colors against the snow and swoop in for instant snacks.

  • Pinecones

Finches and crossbills are experts at prying open pinecones to get seeds. Snow doesn’t bother them because cones stay on branches where they’re easy to access.

  • Tree Bark Buffets

Woodpeckers, nuthatches, and creepers search tree bark for sleeping insects, larvae, and eggs. Snow barely affects this feeding strategy since the action happens on trunks and branches.


5.Using Stored Fat and Energy Wisely

This may not be “finding food,” but it’s part of the survival strategy. Some birds eat heavily in the fall to build fat reserves. These reserves act like tiny internal energy batteries. When a storm makes food hard to find for a day or two, their bodies keep them going. Chickadees, for example, gain up to 10% of their body weight in fat by evening—then burn most of it overnight just staying warm.


6.Human Help

Many birds rely on backyard feeders during snowy months. Seed feeders, suet blocks, and even fruit left out by humans give birds a reliable food source when natural supplies are tough to reach. Some species, like the bold little chickadee, will even stash seeds they get from feeders in hidden spots for later. Basically, your backyard becomes their winter grocery store.

In winter, a quality feeder really helps. Our bird feeder is built from durable, weather-resistant cedar that holds up perfectly through snow, ice, and cold. It not only keeps food accessible for birds in harsh weather, but also adds a warm, natural look to your yard. Moreover, it has a dedicated spot where you can install a bird box camera, letting you watch visiting birds up close while they feed.

Posted on Leave a comment

Do Bird Box Cameras Disturb Birds?

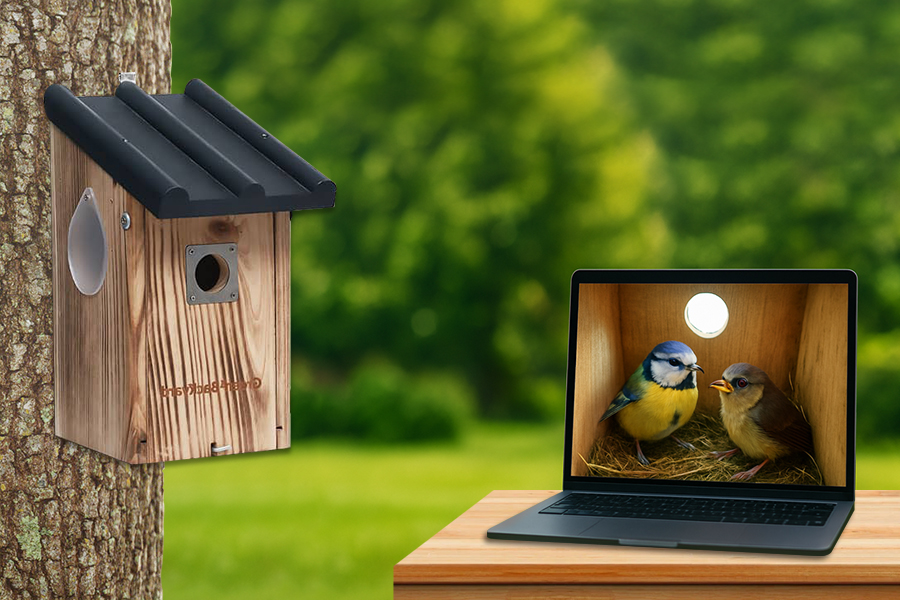
Bird box cameras let us watch birds up close, see eggs hatch and watch chicks grow. Many people worry that putting a camera in a bird’s nest might bother them. The good news is: bird box cameras DON’T disturb birds if used properly. Here’s why.

1.Cameras Are Small and Don’t Take Up Space

Most bird box cameras are tiny and lightweight. They fit neatly in the corner of the nest box without taking away space that birds need to move around. Because of this, birds can go about their normal activities without feeling crowded or blocked. Unlike opening the nest box repeatedly, the camera stays in place quietly, so birds are not bothered.


2.Cameras Are Installed Before Nesting

Bird box cameras are usually installed before nesting season begins. This means birds choose the box knowing the camera is already there. Because the camera is there from the start, birds accept it as part of the box. Problems usually happen only when a nest is disturbed during nesting—but with cameras, there is no need to interfere later.

3.Birds Cannot See Infrared Light

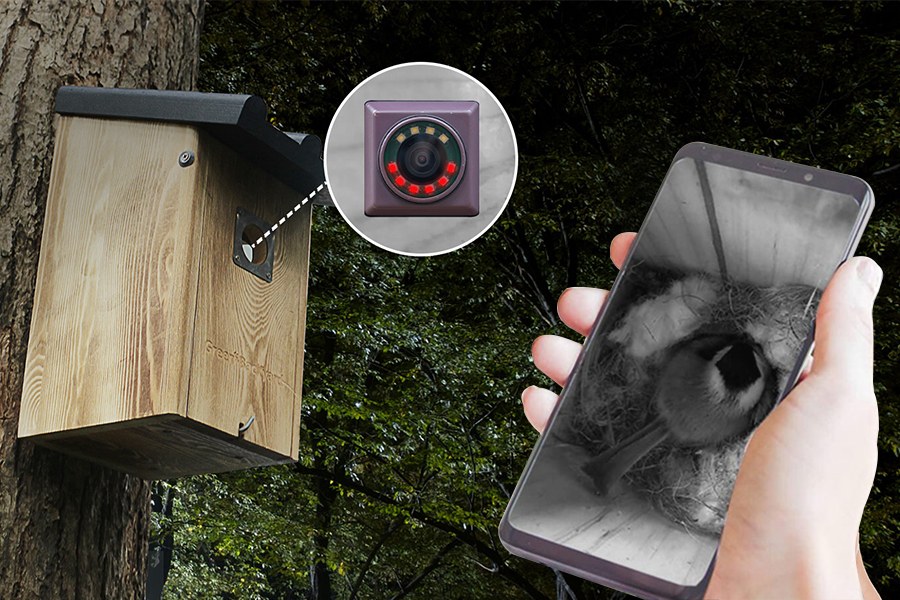
Bird box cameras are equipped with infrared LEDs, which birds cannot see. Their vision ranges roughly from ultraviolet (around 300-400nm) to red (around 650-700nm). Infrared light has a wavelength longer than red light, starting from around 700nm and extending to thousands of nanometers, which allows the camera to record activity even at night without disturbing the birds.

850nm vs 940nm LEDs

Birds cannot see infrared light, whether it’s 850nm or 940nm.

850nm LEDs:

  • Slightly closer to visible red light.
  • Can produce a very faint red glow that humans can see in complete darkness.
  • More sensitive for cameras, so the image is usually brighter and clearer at night.
  • Still invisible to birds, so they are not disturbed.

940nm LEDs:

  • Fully invisible to naked eyes (no red glow).
  • Slightly less bright for the camera sensor, so the image may be darker.
  • Still completely invisible to birds.


4.Camera Reduces Human Disturbance

Checking the box often can stress birds, make them nervous, or even cause them to abandon the nest. With a bird box camera, you can watch everything from a distance on your phone, tablet or computer. Birds remain safe and calm because they are not disturbed by human touch.


5.No Noise or Moving Parts

Bird box cameras are designed to be silent and still. They have no moving parts, such as motors or fans, and they do not make buzzing or whirring sounds. This is important because birds are sensitive to noise, especially when they are nesting and caring for their young.

Since the camera does not move or make sound, birds quickly learn that it is not a threat. They do not react to it and continue their normal behavior, such as laying eggs, feeding chicks and cleaning the nest.

6.Used by Scientists and Conservation Groups

Bird box cameras are widely used by scientists, universities, wildlife groups, and bird conservation organizations around the world. These groups study bird behaviour, breeding success and population health. Protecting birds is always their top priority, so they carefully choose tools that do not cause harm or stress.

Many bird box cameras are used year after year in the same nest boxes. Birds return each season and continue to nest successfully. In fact, cameras often improve bird protection. By observing nests remotely, scientists can spot problems such as predators, parasites, or nest damage without opening the box. This reduces human interference and helps increase nesting success.

Our Recommendations

When choosing a bird box camera, it’s important to pick one that suits where your bird box is located and how you want to watch the birds. Below are some popular and reliable options.


WiFi Bird Box Camera

  • 3MP high resolution
  • 940nm IR & daytime LEDs
  • Motion detection with notifications
  • IP66 waterproof

Shop Now

Long-Range WiFi Bird Box Camera

  • 1080p Full HD
  • 940nm IR & daytime LEDs
  • Wireless range up to 650ft
  • 64GB built-in SD card

Shop Now

PoE Bird Box Camera

  • 4MP high resolution
  • 940nm IR & daytime LEDs
  • PoE range up to 328ft
  • Onvif-compatible

Shop Now

TV Bird Box Camera

  • 700TVL resolution
  • 2.5mm adjustable lens
  • 940nm invisible IR LEDs
  • Watch on TV or HDMI monitors

Shop Now
Posted on Leave a comment

How to Keep Bird Baths from Freezing?

Winter can be tough for our feathered friends. Birds need fresh water for drinking and bathing, but freezing temperatures can make access to water difficult or impossible. Fortunately, there are several natural, chemical-free ways to keep your bird bath from freezing.

Choosing the Right Bird Bath

First things first, you need to choose a bird bath for winter use.

  • Material: Concrete and stone baths hold water longer than thin metal or plastic because they retain heat better. Ceramic can also work but may crack in extremely cold temperatures.
  • Depth: Shallow baths freeze faster, so aim for a bowl that is at least 2-3 inches deep in the center. Birds prefer shallow edges to sip safely.
  • Shape and Design: A wide, shallow basin exposes more water to cold air, so a slightly deeper bowl with sloping sides can slow freezing while still allowing birds to access water. Additionally, dark surfaces absorb sunlight, gently warming the water throughout the day.


Location Matters

Where you place your bird bath can significantly affect how long it stays ice-free. Here are some tips:

  • Sunlight: Position the bath in a sunny spot. Even a few hours of direct sunlight can prevent freezing.
  • Wind Protection: Wind accelerates freezing. Placing your bath near a natural windbreak, like shrubs or a fence, can help.
  • Elevation: Consider using a stand or pedestal to elevate the bath slightly. This reduces heat loss from the cold ground.

7 Methods to Keep Bird Baths from Freezing

1.Use a Floating Object

A floating object, such as a small ball or a clean piece of wood, can help keep the water moving. As it moves with the breeze, it helps keep the water from sitting completely still, which slows down freezing.


2.Use Moving Water

Birds are naturally attracted to moving water, and moving water is less likely to freeze than still water. Even a small ripple can make a big difference in winter. You do so by using a solar-powered fountain or a simple water dripper. If you don’t want to invest in a fountain, you can gently stir the water once or twice a day.  


3.Add Warm Water Gradually

Instead of refilling with ice-cold water from the tap, use slightly warm water when topping up. Adding warm water raises the overall temperature of the bath and delays freezing. You don’t need to boil it; just use lukewarm water or slightly warmer.

Another tip is to change the water more frequently. Fresh water absorbs heat from the sun more efficiently than water that has been sitting frozen. Regularly refilling the bath keeps the water slightly warmer and reduces ice formation.

4.Use Natural Light and Shelter

Place your bird bath where it will receive the most winter sunlight, preferably in a south-facing location. Direct sunlight can significantly slow down freezing, even on very cold days. Wind is another major factor in freezing. Strong winds accelerate heat loss, making water freeze faster. Position your bird bath near natural windbreaks, such as shrubs, hedges or trees.


5.Use Natural Heat Sources

Placing your bird bath near a south-facing wall can help, as well as absorb and radiate heat from the sun. Rocks placed around or under the bath can also store heat during the day and release it at night, slightly raising the water temperature. Even your landscaping choices matter. Dark mulch or stone surrounding the bath absorbs heat and helps maintain a slightly warmer microclimate, which can prevent ice from forming too quickly.

6.Clean Regularly

Keeping your bird bath clean is essential. Dirty water freezes faster because debris and algae can create thin ice layers more quickly. Regular cleaning ensures that birds always have safe, accessible water and helps the sun’s warmth reach the water more efficiently.


7.Insulate the Bird Bath

Natural insulation can help slow freezing. Placing the bird bath on a thick layer of straw, wood, or leaves can reduce the amount of cold seeping into the water from the ground. Surrounding the bath with natural materials like branches or brush can also help protect it from the wind, keeping the water slightly warmer for longer.

Bonus Tip: Add a Bird Box Camera

Installing a bird box camera or feeder camera is incredibly useful for monitoring your bird bath in winter. Most bird box cameras have infrared night vision, and you can:

  • See when the water starts to freeze.

You can head out, break the ice and top up with warm water at the right moment.

  • Know when birds are trying to drink but cant.

If you see birds landing, pecking at ice or hopping away frustrated, it’s your cue to thaw the bath. This keeps your feathered friends hydrated and safe.

  • Monitor early-morning conditions.

Freezing usually happens overnight. Most bird box cameras have infrared night vision, so you can check the bath at dawn.

  • Spot snow, debris or blockages.

A heavy snowfall or falling leaves can cover a bird bath. The camera shows you instantly when it needs clearing.

  • Understand when your specific birds use the bath.

Different species drink at different times. Once you know their patterns, you can time your refills to match peak activity.

You might be interested in…

WiFi Bird Box Camera

3MP resolution, 940nm infrared & daytime LEDs, motion detection, etc.

Shop Now

Long-Range WiFi Bird Box Camera

1080p Full HD, 64GB built-in SD card, a wireless range of up to 650ft, etc.

Shop Now

4K PoE Bird Box Camera

4K UHD videos, PoE range up to 328ft, IP66 waterproof, onvif-compatible, etc.

Shop Now

IP Bird Feeder Camera

1080p HD, 64GB built-in SD card, connect to the network via Wi-Fi or Ethernet, etc.

Shop Now
Posted on Leave a comment

How to Use a Bird Box Camera without a Network?

Many bird lovers want to monitor their nest box activity but don’t have a network connection at the installation site. Whether the box is located at the end of the garden, on a remote property, or simply too far from your router, the good news is this: you can still use a bird box camera without a network.

Method 1: Use the Camera’s Built-In Hotspot

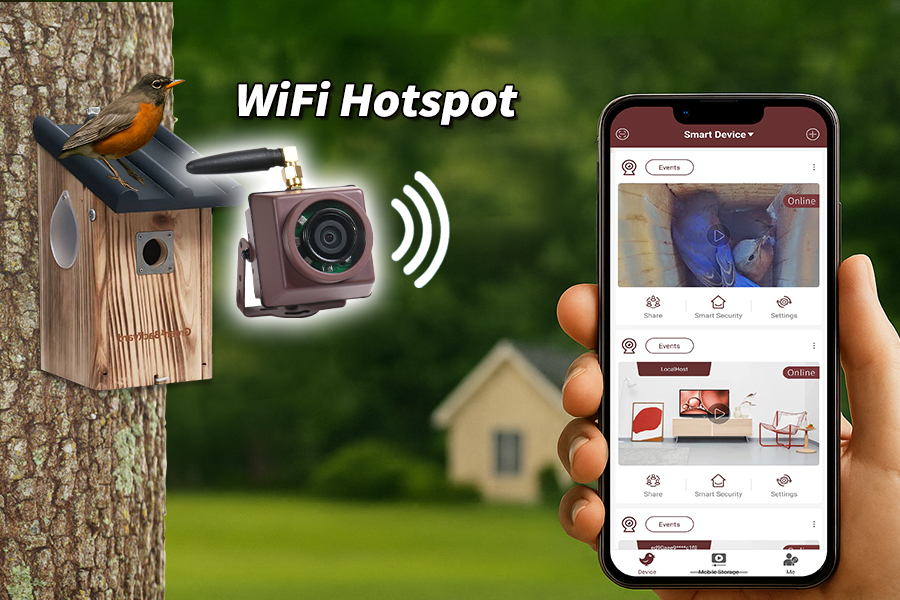
Many WiFi bird box cameras have a built-in hotspot. This allows you to view the live feed directly from your phone, no router or home network required.

When to Use?

  • You want live video on your phone while near the nest box
  • The camera is too far from your home Wi-Fi
  • You don’t need remote viewing outside your property


How to Set It Up?

Step 1: Power on the camera

Plug the camera into its power supply. Wait 30–60 seconds for it to fully boot.

Step 2: Find the camera’s hotspot

Open your phone’s Wi-Fi settings. The camera’s hotspot usually appears as something like: IPC_xxx or camera_xxx. Select it and enter the default password (labeled in the manual).

Step 3: Open the camera app

Launch the compatible mobile app. The app will automatically detect the camera in hotspot mode and follow the on-screen instructions to add the bird box camera to your app. If not, choose: Add Device → Connect via AP Mode / Hotspot Mode.

Step 4: View the live feed

Once connected, you can watch the camera in real time as long as you stay within the hotspot’s range (typically 10 meters).


Method 2: Record to a Local SD Card

If you don’t need live video monitoring, an SD card is the simplest offline solution. The bird box camera records all motion or continuous footage directly to the card, allowing you to review it later.


When to Use?

  • You cannot stay near the bird box
  • You want full-day recordings
  • You only need playback, not live monitoring

How to Set It Up?

Step 1: Insert an SD card

Use a Class 10 or better MicroSD card (typically 64GB-128GB, depending on the camera’s limits). Insert it into the camera’s SD slot before powering on.

Step 2: Configure recording settings

If you can temporarily connect through hotspot mode or a network connection, set:

  • Continuous recording
  • Motion detection (optional)
  • Recording resolution
  • Overwrite oldest files (recommended)

Once set, the bird box camera will continue recording even without network access.

Step 3: Retrieve the footage

When you want to review:

  • Power off the camera
  • Remove the SD card
  • Insert it into your computer or phone adapter
  • Open the video files (usually .mp4 or .h265)
  • You can now watch all footage, save clips, or share highlights.


Method 3: Connect the Camera Directly to a Computer

For bird box cameras that require an Ethernet connection (e.g., long-range WiFi bird box camera, PoE bird box camera, etc.), you can view the live feed on a Windows or Mac computer using VMS.


When to Use?

  • You want live video but no Wi-Fi
  • You have a laptop outdoors or inside
  • You prefer using a large screen
  • You want full camera control offline

What You Need?

  • USB-to-Ethernet adapter
  • A network cable
  • Camera manufacturer’s VMS software
  • Your camera’s default IP address

How to Set It Up?


Step 1: Connect the camera to your computer

Connect the bird box camera to your computer using a USB-to-Ethernet adapter. Make sure the camera is powered. Your computer now has a direct connection to the camera.

Step 2: Install VMS software

Download the manufacturer’s VMS / CMS / NVMS / PC Client software. Install it on your computer. Open the program but do NOT add the camera yet.

Step 3: Turn off your computers Wi-Fi

This prevents your computer from trying to use Wi-Fi instead of the camera’s wired connection. Click the Wi-Fi icon → turn Wi-Fi Off. Your computer should now only use the wired USB adapter connection.

Step 4: Add the IP address manually

Because you are connecting directly (no router), you must manually assign your camera’s IP address to the computer:

  • Open Wi-Fi Settings → Network
  • Change from DHCP to TCP/IP
  • Enter the camera’s default IP address
  • IP Address: 192.168.1.50
  • Subnet Mask: 255.255.255.0
  • Click Save

Step 5: Add the camera to VMS

  • Open the VMS software and go to Device Manager
  • Click IPv4 Search
  • Wait a few seconds, and the camera should appear in the list.
  • Select it and click add

Once connected, you can view real-time or recorded videos on your computer and configure camera settings accordingly.

Posted on Leave a comment

Best High-Energy Winter Foods for Birds

Winter can be a tough season for wild birds. Short days, cold winds and frosty nights mean they need more energy than usual just to stay warm. Natural food becomes harder to find when insects hide away and plants stop producing berries and seeds. To help our feathered friends survive the coldest months, we can offer a reliable source of food right in our own backyards.

Here, we’re gonna introduce the best high-energy winter foods for birds.

1.Sunflower Hearts

These are just sunflower seeds without the shell. They offer the same high fat and protein as black oil sunflower seeds but are easier for birds to eat—especially smaller birds that struggle to crack shells. They also leave less mess under the feeder.

Birds that love them: chickadees, finches, titmice, nuthatches, cardinals.


2.Suet

Birds burn a lot of energy in cold weather, so suet helps them stay warm through the night. You can buy suet cakes in many flavors or make your own using beef fat mixed with seeds, nuts, or dried fruit. Hang the suet in a cage-style feeder to keep it clean and easy for birds to cling to. Woodpeckers, nuthatches, wrens and even some winter warblers will visit suet feeders.


3.Nyjer (Thistle) Seeds

Nyjer seeds may look tiny but they are full of oil and very nutritious. They are especially helpful for small birds that struggle to find food in winter. Goldfinches, siskins, and redpolls flock to nyjer feeders.


4.Mixed Seed Blends

A good-quality birdseed mix often contains sunflower seeds, millet, cracked corn, and peanuts. This attracts a wide variety of species, which is helpful in winter when natural food is low. Try to avoid mixes high in millet only or wheat, since many birds will toss these aside.


5.Pumpkin Seeds

If you have leftover pumpkins from fall, save the seeds! Pumpkin seeds are packed with fat and nutrients. You can offer them raw or lightly baked (without salt or oil).

Good for: jays, cardinals, woodpeckers, and grosbeaks.


6.Chopped Nuts (Unsalted)

Walnuts, pecans, hazelnuts, almonds, and cashews give birds quick energy and protein. Offer them chopped so smaller birds can eat them too.

Never give: salted, flavored, or chocolate-coated nuts.


7.Oats

Plain oats—either rolled or quick oats—can be scattered on a platform feeder. They provide carbohydrates and are a great low-cost supplement. Avoid instant oatmeal packets because they often contain sugar or flavorings.


8.Grains and Cereals

Plain whole grains can help ground-feeding birds. These give birds steady energy during cold weather.

Good options:

  • brown rice (cooked or uncooked)
  • barley
  • quinoa (uncooked)
  • plain, unsweetened cereal like Cheerios


9.Fruit

Even in winter, fresh fruit can be a treat. Fruits also add variety to the winter diet and help attract species that do not eat many seeds. You can place fresh fruit on a platform feeder or stick the halves onto branches.

Good choices include:

  • apple slices
  • orange halves
  • banana pieces
  • grapes (halved)

Moreover, dried fruit, such as raisins, currants, chopped apricots or cranberries, gives birds natural sugars and quick energy. Robins, bluebirds, mockingbirds and waxwings often enjoy dried fruit.


10.Mealworms

Mealworms provide a great source of protein and fat. While live mealworms are more appealing to birds, dried mealworms are easier to store and handle. Robins, bluebirds, wrens, and chickadees love them. Even though some of these species migrate, many stay in certain areas during winter and appreciate the added nutrition.


11.Leftover Meat Scraps (Plain)

Very small pieces of plain, cooked meat (no seasoning, no skin, no fat) can be given in tiny amounts. This mimics insects for carnivorous birds.

Safe options: cooked chicken or turkey pieces.

Never give: salty or seasoned meat, ham, processed meats.


12.Hard-Boiled Eggs

This might surprise people, but birds benefit from eggs too! Crush up hard-boiled eggs (including the shell for added calcium) and place them on a tray. Eggs provide protein and nutrients that help birds stay strong during winter.


Posted on Leave a comment

2025 Christmas Sale Is Here!

This holiday season is finally here, a time of sparkling lights, warm cups of cocoa, and cozy moments with loved ones. But if you’re someone who finds joy in feathered visitors outside your window, the Christmas spirit becomes even more magical when nature joins the celebration.

This year, we’re spreading the cheer with our fantastic Christmas Sale, where you can enjoy exclusive savings — up to 30% off our bird box cameras! Whether you’re treating yourself or gifting a fellow bird lover, this is the perfect chance to turn your backyard into a winter wonderland for birds.

Holiday Cheer in Every Nest – 25% OFF Bestsellers

Ever wonder what goes inside the nest? Now, you can capture it all with our bird box cameras, from nest building and egg laying to feeding and fledglings taking flight. These intimate moments are magical, and that’s why so many bird lovers trust our cameras every season. This Christmas, our most loved bird box cameras and bundles are 25% OFF, so grab yours now!


WiFi Bird Box Camera Bundle

Watch live HD video right on your phone or tablet, enjoy crisp audio, and see nesting activity clearly with enhanced night vision.

Shop Now

PoE Bird Box Camera Bundle

Prefer a wired solution? Our PoE bird box camera delivers smooth livestreaming with a single cable for power + data.

Shop Now

Long-Range WiFi Bird Box Camera Bundle

Ideal for larger gardens, farms, woodland areas, or reserves where the nest is far from the home router.

Shop Now


Our Holiday Giveaway

Imagine waking up on Christmas morning to see a robin fluffing feathers or a blue tit bringing food to its young. This year, we’re adding a little extra sparkle. Every time you make a purchase during our Christmas sale (12/1-12/26), you’re automatically entered into our Holiday Giveaway.

Every order = 1 entry.

Yes, it’s that simple. One lucky bird lover will receive a WiFi Bird Box Camera, which lets you watch wildlife in real time on your phone or tablet. The winner will be announced on December 27, just as the holiday week unfolds. Maybe it will be you!


Use Code JOLLY25 for 20% OFF

Enjoy the spirit of the season with 20% OFF sitewide when you use code JOLLY25 at checkout. Whether you’re shopping for a thoughtful gift or adding new gear to your own garden setup, this Christmas exclusive makes it easier than ever to bring birds closer to home. This offer is valid until 12/26. It does not apply to sale items and cannot be used in conjunction with other coupons or discounts.

Gift on Us

Christmas is all about giving — and this season, we’re joining in the tradition.

Buy any 2 bird box cameras, and you’ll receive a free gift of your choice. It’s our way of saying thank you for supporting wildlife, for nurturing backyard habitats, and for sharing the joy of birds with your home and family.

You can choose from one of these holiday treats:

  • 10M power extension cable
  • 12V battery cable (with clamps)
  • 64GB SanDisk TF card
  • Cedar bird feeder

Free gifts are sent randomly. You may leave a note with your preferred choice, but when one gift is out of stock, we will send another available option. This offer runs until December 26, so don’t wait too long.


Up to 30% OFF Christmas Specials

If you’re shopping for someone who loves their garden visitors, or if you’re the one who cannot resist a curious woodpecker or shy blue tit, explore three Christmas favorites perfect for any backyard habitat.

Smart Bird Feeder Camera

There’s no better way to bring birds to your porch, patio or garden than with a feeder that does more than hold seed.

Shop Now

Bird Feeder with WiFi IP Camera

Equipped with a WiFi bird box camera, you can watch your feathered friends as they arrive, perch and snack.

Shop Now

WiFi Bird Box Camera with WiFi NVR

For bird lovers of all entry levels or ages! This bird box camera is super easy to use – just connect it to the WiFi NVR, and you can stream live!

Shop Now


45 Day Christmas Return

Enjoy peace of mind this holiday season. All Christmas purchases are covered by our 45-Day Christmas Return Policy, giving you extra time to test, gift, or set up your cameras without worry. To ensure fast delivery, we’re working closely with local couriers to make sure your package arrives on time. We recommend shopping early, especially for gifts, as demand increases throughout December. You can also refer to the estimated delivery times below to plan your purchase.

Posted on Leave a comment

How to Connect a WiFi Bird Box Camera to an NVR?

Many people install a WiFi bird box camera thinking that the SD card will record everything. But after a few days, they face the same problem:

My SD card is full… how do I save more footage?

Bird activities like nest building, egg laying, feeding, hatching, etc., can last weeks or even months. An SD card simply isn’t enough for long recordings. Because the SD card has limited space, it fills up quickly, and the camera automatically overwrites older footage, causing you to lose key nesting moments. If you want 24/7 recording, smooth playback, and long-term storage, an NVR is the perfect solution. In this guide, you’ll learn exactly how to set up your WiFi bird box camera with an NVR.

Before you start, let’s quickly cover what each device does.

What Is a WiFi Bird Box Camera?

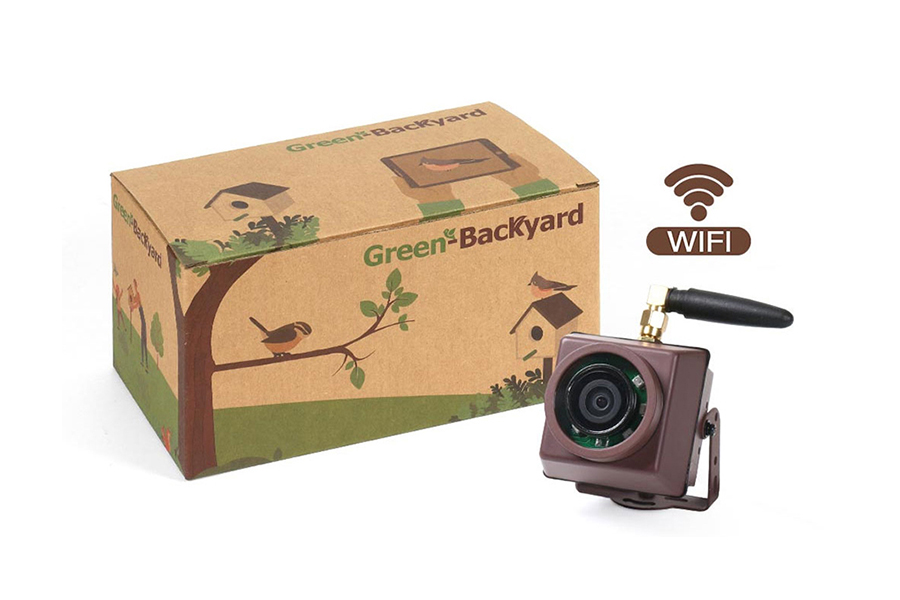
A WiFi bird box camera is a compact IP camera designed to fit inside a birdhouse. It connects to your WiFi network and streams live video to your phone, tablet or PC. Most models support ONVIF or RTSP protocols, which allow them to connect to most NVRs on the market (Dahua, Hikvision, Reolink, and many others).

What Is an NVR?

An NVR records and stores video from IP cameras. It:

  • Records 24/7 or based on events
  • Stores footage on a built-in hard drive (2TB or more)
  • Lets you review and download clips
  • Displays multiple cameras on a monitor

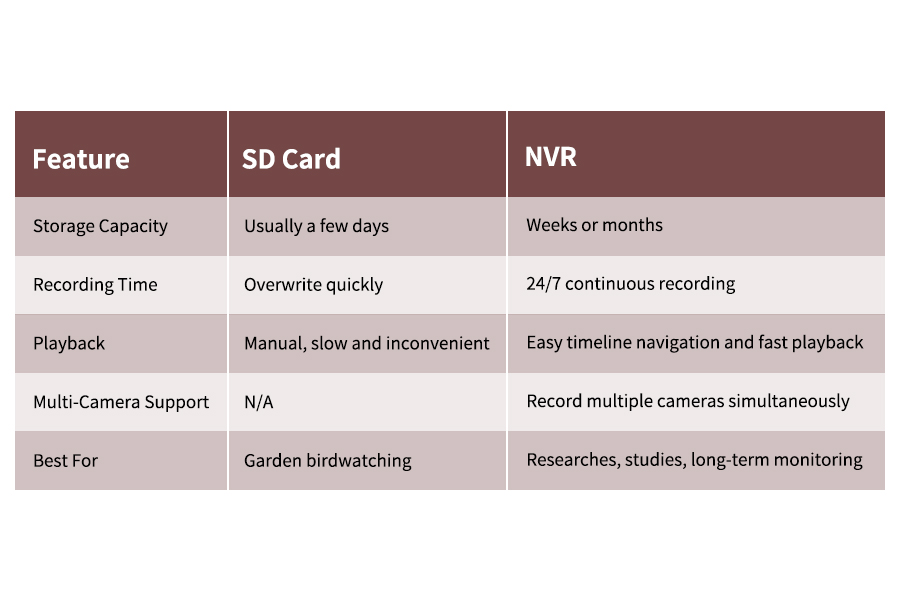
Why Is an NVR Better than an SD Card?

If you’re not sure if an NVR is worth it, let’s make a simple comparison:

What You Need?

Before starting, make sure you have:

  • A WiFi bird box camera (ONVIF/RTSP compatible)
  • A stable home WiFi network
  • An NVR (preferably ONVIF compatible)
  • A 1TB (or above) hard drive
  • A monitor connected to the NVR
  • The camera’s login details (IP address, username, password)
  • A strong WiFi signal around the bird box


If your bird box is far from the house, consider using a WiFi repeater or a powerline adapter to amplify the WiFi signals.

Step-by-Step Guide

Now, follow the instructions below to connect your WiFi bird box camera to the NVR:

Step 1: Connect the Camera to Your WiFi Network

Before adding the camera to the NVR, you must first connect it to your WiFi network.

  1. Power the WiFi bird box camera using the 12V adapter.
  2. Download and open the camera’s mobile app.
  3. Follow the app’s instructions to connect the camera to your WiFi network.
  4. Confirm that the live video loads correctly on your phone.

Once the camera’s live, it’ll receive an IP address from your router.  


Step 2: Install the Hard Drive

Before your NVR can record video, you need to install a hard drive.

  1. Open the NVR case (refer to the manual for your model).
  2. Insert a compatible hard drive into the drive bay and secure it with screws.
  3. Connect the SATA and power cables from the NVR to the hard drive.
  4. Close the NVR case. Power on the NVR and check the system menu to make sure the hard drive is recognized.

Once installed, your NVR is ready to store recordings from your bird box camera.


Step 3: Connect the NVR to Your Router

It’s important that you connect the NVR to the same router your WiFi bird box camera is connected to. This ensures the NVR can detect and communicate with your camera over the network. Simply use an Ethernet cable to connect the NVR’s LAN port to one of the LAN ports on the back of your home router.

Step 4: Find the Cameras IP Address

You will need the IP address to add the camera to your NVR.

You can find it by:

  • Checking the camera’s app
  • Logging into your router’s device list
  • Using an IP scanner tool on your computer

Write down the following details:

  • IP address
  • HTTP port / ONVIF port / RTSP port
  • Username and password

Step 5: Add the WiFi Bird Box Camera to Your NVR

On the NVR’s monitor:

  1. Open Camera Management or Device Management (names vary by brand)
  2. Look for an option like Add Camera or Manual Add.
  3. Choose ONVIF or RTSP as the protocol if required.
  4. Enter:
  5. The camera’s IP address
  6. The ONVIF / RTSP port (default is often 8000, 554 or 8899)
  7. Username and password
  8. Click Connect, Add or Save.

If all goes well, the NVR should now display the camera’s live video. You can repeat the same steps to connect multiple cameras to the NVR, but make sure you don’t exceed the NVR’s total capacity (the number of channels it can handle).


Troubleshooting Common Issues

Sometimes the connection doesn’t work immediately. Here are common problems and fixes:

Camera Not Showing Up?

  • Make sure the camera and NVR are on the same network.
  • Check that your WiFi signal is strong near the bird box.
  • Restart both the camera and NVR.

Login Failed?

  • Check username and password.
  • Make sure ONVIF is enabled in the camera’s settings.
  • Reconfirm the port number.

Video Lag or Dropouts?

This is usually a WiFi signal problem. To fix it, you can:

  • Move the router closer or use a mesh WiFi.
  • Use a WiFi extender or a powerline adapter to boost the signal strength.